
After reading about SSAO. For the week 7, I took the first shot at implementing it.
I currently have 3 passes in my implementation before the final output shows on screen.
- Geometry pass
- SSAO pass
- Lighting pass
Geometry pass: The functionality of the geometry pass remains the same; like the one, I had for deferred rendering.
- I create a frame buffer (G-buffer).
- I create 3 color buffers and bind it to the G-buffer.
- Color buffer 0: To store all the vertex positions (RGB).
- Color buffer 1: To store all the normals (RGB).
- Color buffer 2: To store diffuse and specular textures (RGBA).
- I create a depth buffer (render buffer) and bind it to the G-buffer.
I bind the G-buffer in the geometry pass, pass in the model, view, & projection matrices as uniforms to the shaders. The fragment shader for the geometry pass is the same as I had before: I store the positions(Color buffer 0) and normals(Color buffer 1) in the framebuffers, I sample the diffuse and specular textures(Color buffer 2) and again store them in the framebuffers. There is one small change in the vertex shader though, i.e. instead of transforming the positions and normals to the world space, I transform them to the view space and then pass them to the fragment shader.
After storing all the necessary geometric information in the G-buffer, it was time to compute the ambient occlusion factor (in SSAO pass).
SSAO pass: To calculate the ambient occlusion factor, I needed positions, normals and a random vector for each fragment. I need the random vector to calculate the orthonormal basis for TBN matrix (Orthonormal basis TBN matrix is used to orient the samples along the surface of the fragments). As it is expensive to calculate a random vector for each fragment, I stored a 4×4 texture of random vectors, wrapped it to repeat mode and sampled them in the SSAO fragment shader. So I bound a total of 3 textures in the SSAO pass.
- Positions
- Normals
- 4×4 texture of random vectors
The result of the SSAO pass would be an ambient occlusion factor which will be used in the lighting pass. So after performing SSAO calculations, I had to pass in the occlusion factor to the lighting pass. For this reason, I created another framebuffer and bound it in the SSAO pass.
The vertex shader of the SSAO pass did a single job i.e. to pass the texture coordinates to the fragment shader.
The fragment shader is where all the major calculations happened. I first created a tangent vector which was orthogonal to the normal vector. I used Gramm-Schmidt’s process (project the sampled random vector onto the normal and then subtract the projected vector with the random vector which gives a direction vector orthogonal to the normal) to obtain the tangent vector. I then applied cross-product to the normal and the tangent vector to get another vector (bitangent) which was orthogonal to both the normal and the tangent vector. With all the 3 orthogonal vectors in hand, I created a TBN matrix.
After creating the TBN matrix, I looped through all the samples of the kernel and:
- Oriented the samples to the surface of the fragment by multiplying the samples with the TBN matrix.
- Transformed the samples from the tangent space to the view space by adding the samples (sample values would previously be: -1 =< X =< 1, -1 =< Y =< 1, 0 =< Z =< 1 ) with the fragment position. Before doing this, I also multiplied the samples with a radius value. This radius value can be visualized as the radius of the hemisphere, in future, this value can be varied to get different effects from the SSAO calculation. After transforming the samples to view space, we can visualize the samples as though they are surrounding the fragment in all directions.
- Multiplied the samples with the projection matrix to get the samples in projection space. I also performed perspective division for the samples (Generally, this operation is automatically performed at the end of the vertex shader).
- I then sampled these samples (which are now present in screen space) with the position texture to retrieve the Z (sampled depth) value.
- Now I check if the sampled depth value is within the radius that we specified (range check). This range check is important, especially for the fragments that make up the edges of the meshes.
- If the sampled depth is within the radius and is greater than the depth of the fragment then I increment 1 to the occlusion factor.
After looping through all the samples I get the number of samples whose depth value is greater than the depth value of the fragment. Let’s call it ‘occlusionNumber’. I then divide the ‘occlusionNumber’ with the total number of samples and subtract it with 1.0 to get the exact ambient occlusion factor. I store this ambient occlusion factor in the SSAO frame buffer.
3. Lighting pass: Previously I only used positions, normals, diffuse and specular textures for the lighting pass (i.e. to calculate lighting). This time, I also have the ambient occlusion factor to help me with the lighting calculation. So along with the other framebuffers, I also bound the SSAO framebuffer as a uniform (which contained the occlusion factor) to the shader. I added a simple point light to my demo and performed lighting calculations. The occlusion factor was multiplied in a straightforward fashion to the ambient light component which contributed to the final color of the fragment.
Here is a side-by-side comparison of how the output looked without and with SSAO.
Without SSAO:

With SSAO:
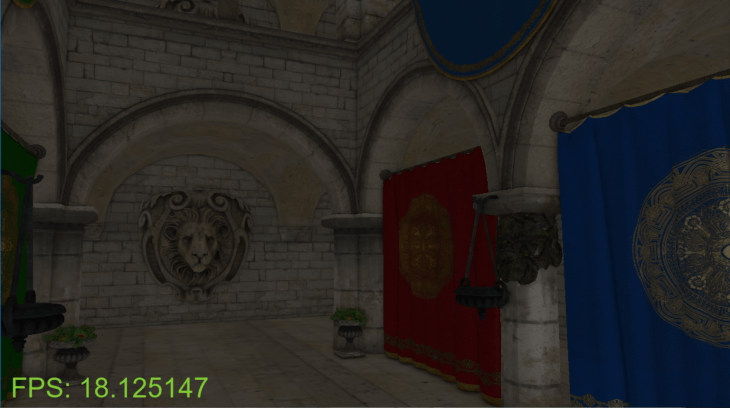
Here is a .gif image for better visualization:
As you can see, the framerate has drastically dropped from 67-90 fps to 17-20 fps with the screen size 1280 x 720. I was able to pump the framerate to 35-38 fps by reducing the samples from 64 to 32.
